
The Silent Destroyers in Your Home
Finding carpenter ants in your home can feel like finding uninvited guests who’ve been secretly remodeling your walls—without your permission and definitely not to code. If you’re wondering how to exterminate carpenter ants in house settings, I’ve put together this quick solution guide to help you tackle these unwelcome visitors:
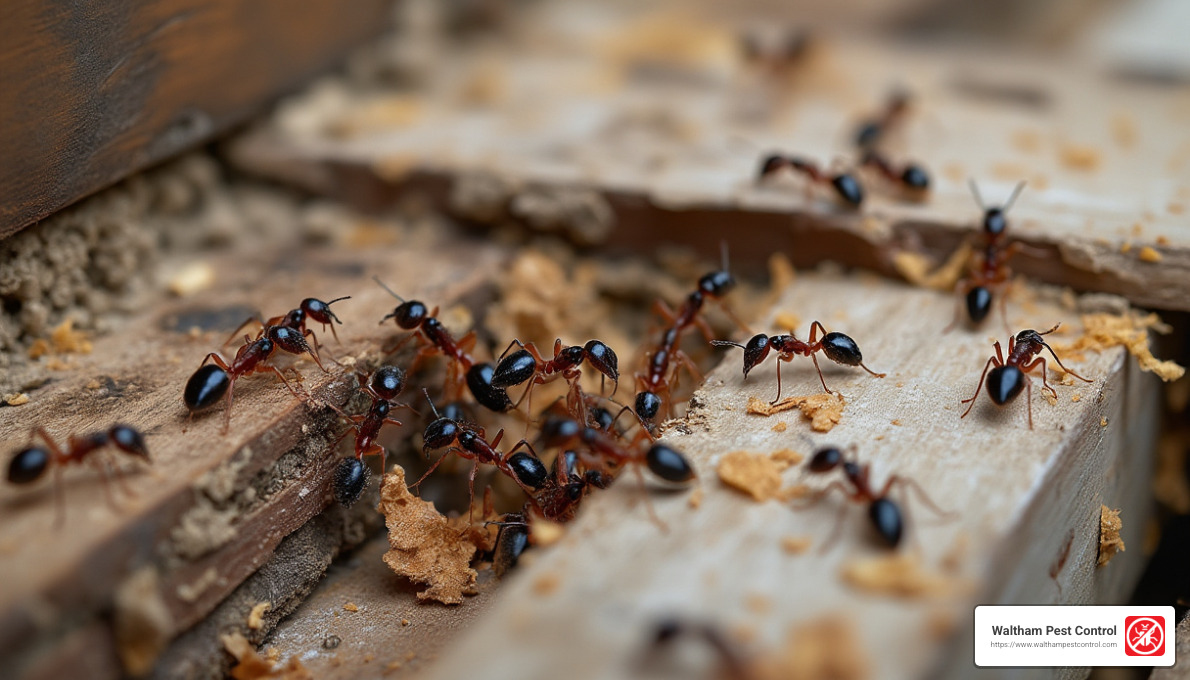
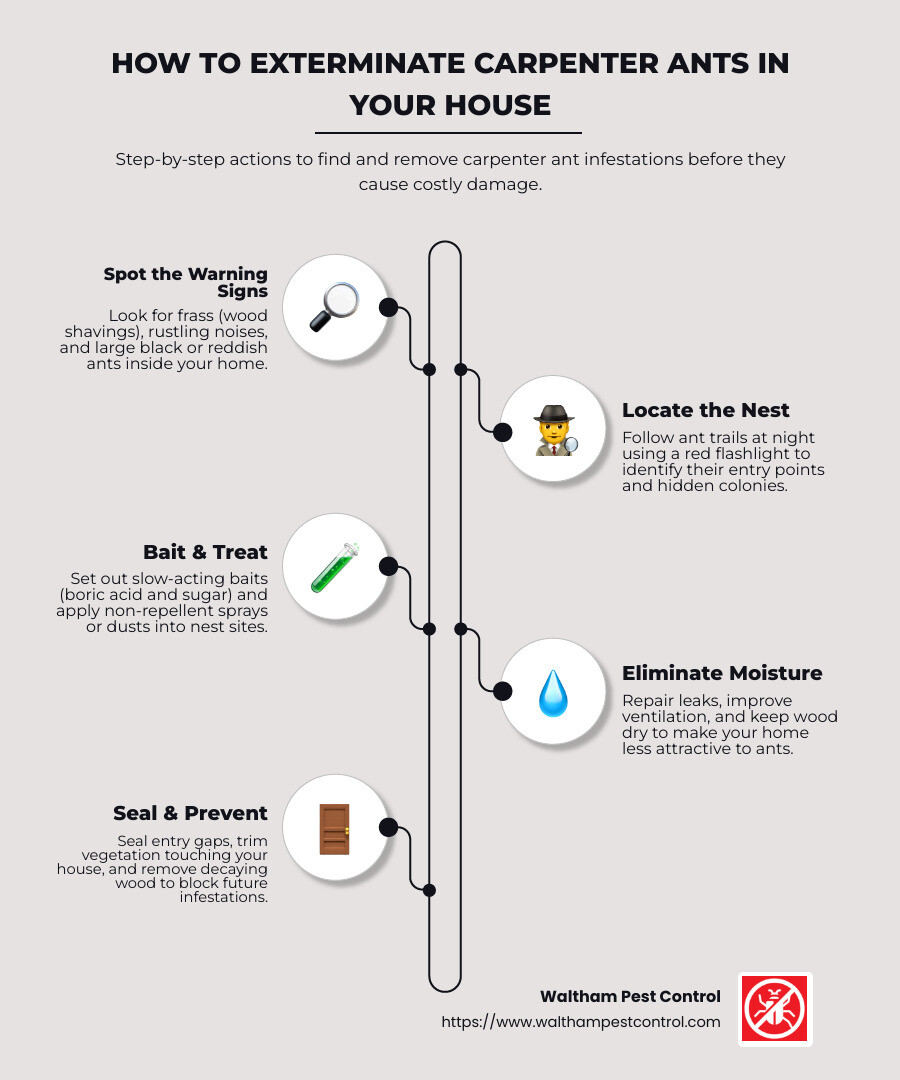
- Identify the infestation – Look for wood shavings (frass), rustling sounds in walls, or large black/reddish ants (¼-½ inch)
- Locate the nest – Follow ant trails at night with a red flashlight
- Apply treatment:
- Bait method: Mix 3 tablespoons boric acid with ½ cup sugar and water
- Direct treatment: Use diatomaceous earth or non-repellent sprays in wall voids
- Fix moisture issues – Repair leaks and improve ventilation
- Seal entry points – Caulk cracks, trim branches touching your house
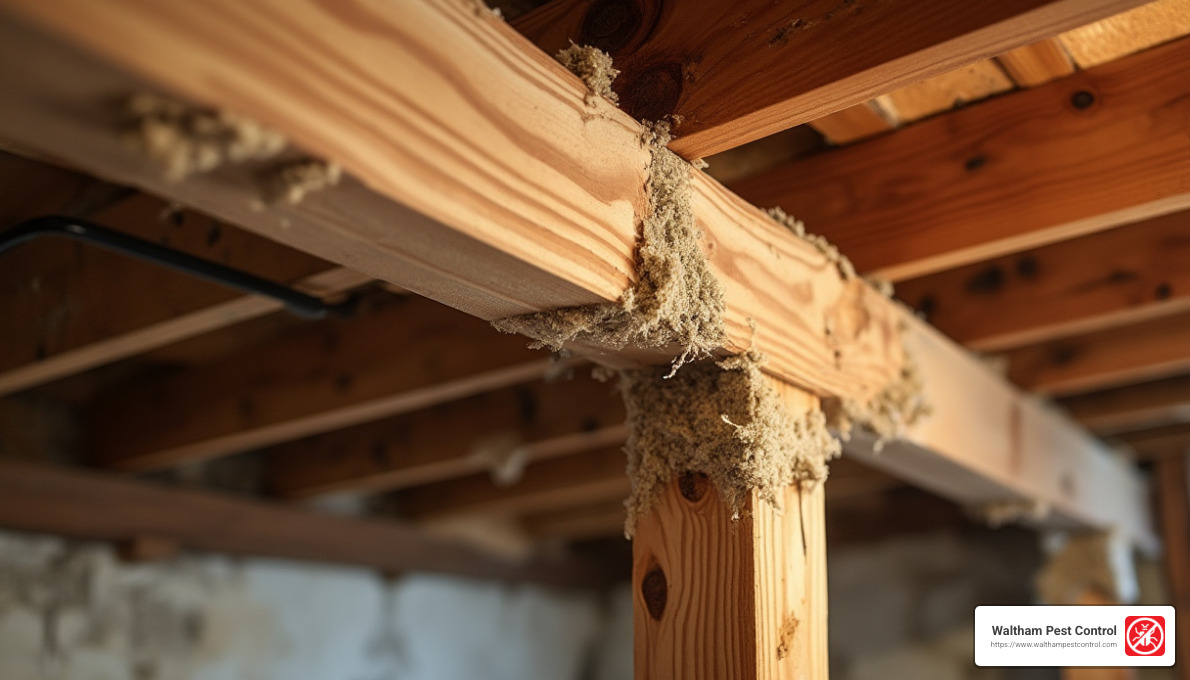
These silent destroyers are the ultimate home renovators—except their work involves hollowing out your structural beams rather than reinforcing them. Unlike termites, carpenter ants don’t actually eat wood. Instead, they excavate intricate nest galleries through it, leaving behind distinctive sawdust-like frass that serves as the first clue many homeowners notice. With colonies that can grow to over 3,000 workers within just a few years, addressing a carpenter ant problem promptly isn’t just recommended—it’s essential for protecting your home’s integrity.
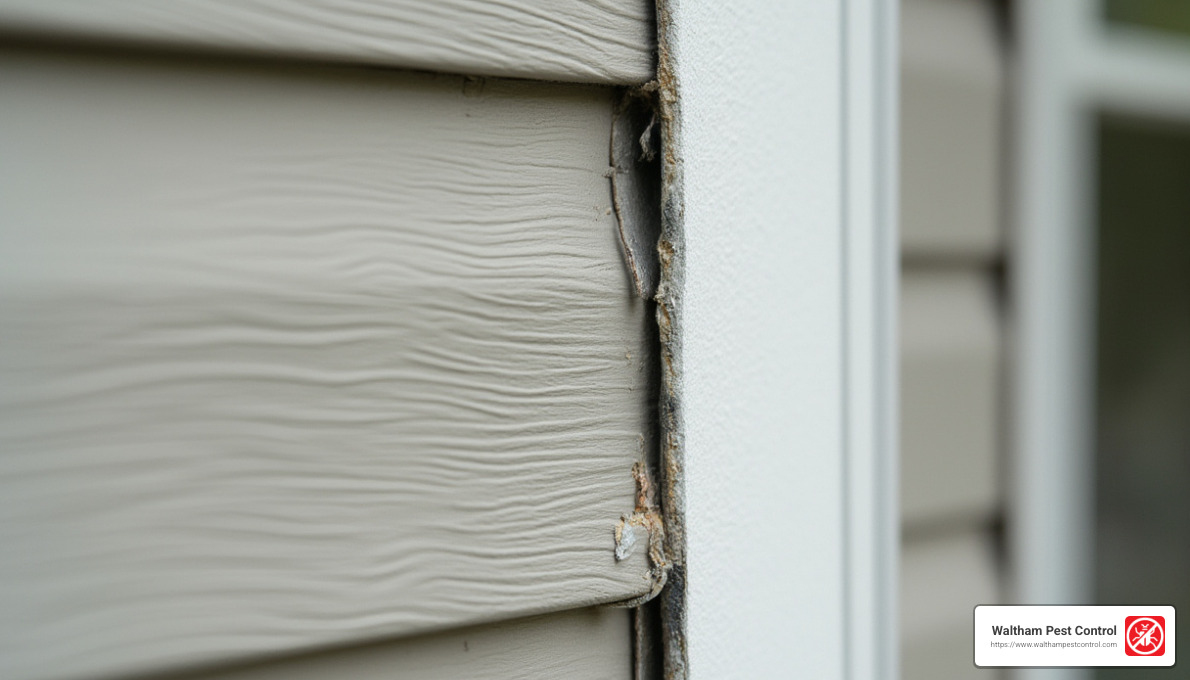
Most of us don’t realize we have a carpenter ant issue until significant damage has already occurred. These industrious insects are particularly attracted to moisture-damaged wood, which is why areas near leaky pipes, damaged siding, or humid crawl spaces become their prime real estate. Left untreated, they’ll establish satellite colonies throughout your home, expanding their territory and increasing the potential for serious structural problems.
I’m Waltham Pest Control, President of Waltham Pest Control with over 40 years of experience helping Massachusetts homeowners tackle pest problems including how to exterminate carpenter ants in house situations. My team and I have seen how these persistent pests can infiltrate even the most well-maintained homes. What makes carpenter ants particularly challenging is their ability to establish hidden colonies deep within your walls, requiring specialized knowledge and targeted treatments to eliminate completely.
If you’re looking for more information about dealing with ants in your home, we have additional resources to help you understand these pests better:
– dealing with ant infestation
– pavement ant infestation
Throughout this guide, I’ll share the professional techniques we’ve refined over decades to help you understand these wood-destroying insects and the most effective ways to send them packing before they cause costly damage to your home.
Carpenter Ant 101: Identification & Early Warning Signs
Let’s face it—nobody wants to share their home with wood-destroying insects. Before you can tackle a carpenter ant problem, you need to know exactly what’s marching through your kitchen or nesting in your walls.
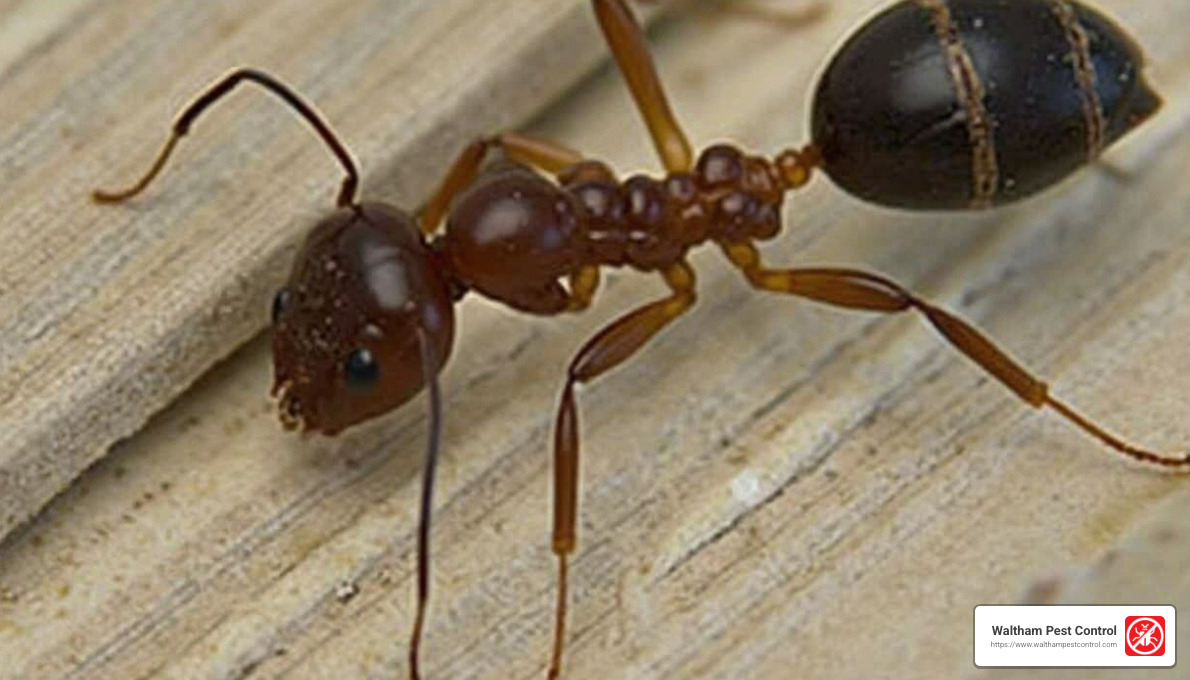
Carpenter ants are the giants of the ant world here in Massachusetts. Workers typically measure between ¼ to ½ inch long, while queens can grow even larger, reaching up to ¾ inch. Most carpenter ants you’ll encounter around Boston and the surrounding areas are primarily black, though some may have reddish or yellowish highlights. The Florida carpenter ant species, which we occasionally see in Eastern Massachusetts, sports a distinctive reddish-brown outfit that makes it stand out from its darker cousins.
“Carpenter ants are nature’s recyclers, breaking down dead wood in forests,” our senior technician often tells worried homeowners. “The problem starts when they decide your home’s wooden structures are fair game for their next renovation project.”
What makes these ants unique is their distinctive appearance. They have a clearly defined narrow waist (unlike termites), six legs, and elbowed antennae that look like they’re permanently bent at attention. Their bodies appear segmented with an oval shape. When you spot large ants matching this description in your Burlington, Cambridge, or other Eastern Massachusetts home, it’s time to investigate further.
The most telling early warning signs that you might need to learn how to exterminate carpenter ants in house include:
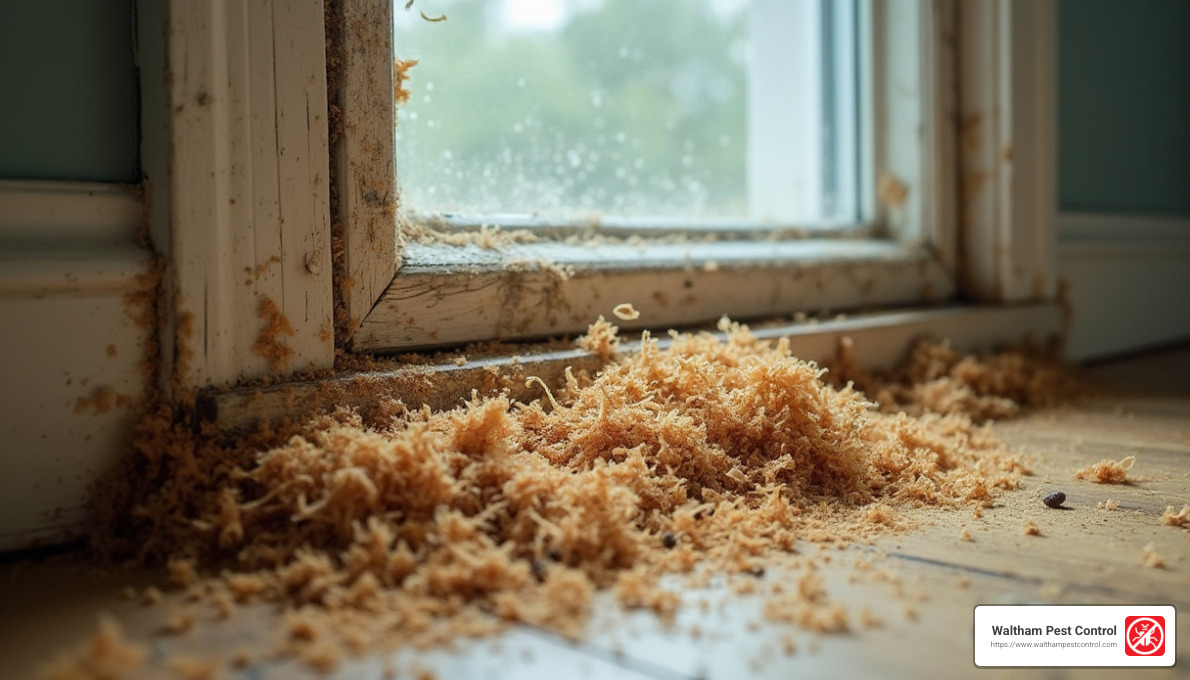
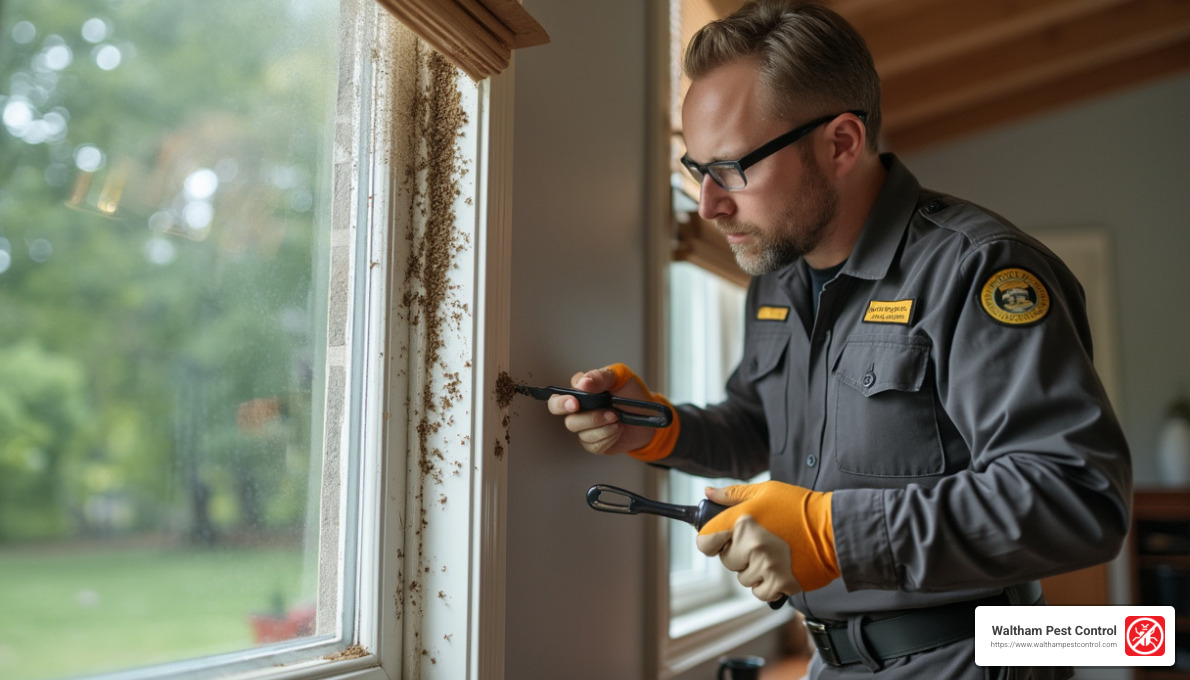
Frass piles that resemble sawdust are often the first visible sign. Unlike termites, carpenter ants are neat freaks, constantly pushing out wood shavings mixed with insect parts from their galleries. This material might accumulate beneath windowsills, along baseboards, or in corners of your home.
Rustling sounds within your walls can be downright creepy. Place your ear against a suspicious wall or wooden beam (especially at night when these nocturnal creatures are most active), and you might hear faint rustling or crackling sounds—that’s the sound of carpenter ants hard at work excavating your home.
Winged ants suddenly appearing indoors, particularly during spring and early summer, suggest a mature colony has set up shop nearby. These winged reproducers (called swarmers) emerge when a colony is ready to expand its territory.
Smooth tunnels in wood that look almost professionally sanded are a hallmark of carpenter ant damage. These galleries follow the softer spring wood grain but leave the harder summer wood intact, creating a distinctive pattern.
Moisture hotspots in your home deserve extra scrutiny. Since carpenter ants prefer moist, decaying wood, any areas with water damage—around leaky pipes, under poorly sealed windows, or in damp basements—become prime real estate for these destructive pests.
In our four decades serving communities from Acton to Woburn and throughout Eastern Massachusetts, we’ve found most homeowners don’t realize they have a problem until they spot worker ants foraging. What’s concerning is that visible ants represent only about 5% of the colony—the rest remain hidden within your walls or wooden structures, continuing their damage out of sight.
For more detailed information about carpenter ant identification and biology, visit our comprehensive carpenter ant guide.
Termites vs. Carpenter Ants—Why It Matters
Mistaking carpenter ants for termites (or vice versa) is more than just an identification error—it can lead to completely ineffective treatment strategies and wasted money. While both pests can cause significant structural damage, they differ dramatically in appearance, behavior, and the type of damage they cause.
“The difference between carpenter ant and termite damage is crucial,” explains our lead inspector. “Carpenter ants create galleries that are remarkably clean and smooth, almost as if they’ve been sandpapered. Termites leave behind mud-like material and their tunnels follow the grain of the wood.”
| Feature | Carpenter Ants | Termites |
|---|---|---|
| Body Shape | Narrow, pinched waist | Straight, broad waist |
| Antennae | Elbowed | Straight, beaded |
| Wings (if present) | Front wings longer than back wings | Equal-length wings |
| Wood Damage | Smooth, clean galleries with visible grain | Rough galleries filled with mud and soil |
| Wood Consumption | Don’t eat wood, just excavate it | Actually consume wood |
| Frass | Coarse sawdust with insect parts | No visible frass piles |
| Activity | Primarily nocturnal | Active 24/7 |
| Nesting | Prefer moist, decaying wood | Can thrive in dry, sound wood |
This distinction matters because treatment approaches differ significantly. Termites require specialized soil treatments and baiting systems, while carpenter ant control focuses on locating and eliminating nests while addressing moisture issues that attracted them in the first place.
In Eastern Massachusetts, we encounter both pests regularly, but carpenter ants tend to be more common in many communities from Boston to Lexington and throughout Middlesex County. Properly identifying which wood-destroying insect you’re dealing with ensures you’ll implement the right solution from the start and protect your home from further damage.
How to Exterminate Carpenter Ants in House: Step-By-Step Game Plan
When it comes to tackling those wood-destroying invaders, having a clear strategy for how to exterminate carpenter ants in house situations makes all the difference. After helping countless homeowners from Waltham to Cambridge over the decades, I’ve seen that a methodical approach yields the best results.
Step 1: Thorough Inspection
Finding where these destructive insects are hiding is your critical first task. Carpenter ants establish two distinct types of colonies that work together:
Parent colonies contain the all-important egg-laying queen, young larvae, and worker ants. These are typically established in consistently damp wood, often outdoors in tree stumps or inside your home where moisture problems persist.
Satellite colonies act as extensions of the parent colony, housing mature larvae, pupae, and workers. These secondary nests frequently pop up inside homes—even in perfectly dry wood—while maintaining connections to the parent colony.
For an effective inspection, timing matters tremendously. Grab a red-filtered flashlight (regular white light will send the ants scurrying back to hiding) and conduct your search between 10 PM and 2 AM when carpenter ants are most active. Focus on common nesting hotspots: window frames, door frames, roof eaves, decks, and areas with known moisture issues.
Watch carefully for ant highways—trails of workers moving along baseboards, electrical wires, or pipes. You might even try the old technician’s trick of putting your ear against suspicious walls to listen for the faint rustling sounds of ants working inside.
“Finding the nest is half the battle,” our senior technician often tells clients. “I remember tracing an extensive carpenter ant problem in a Lexington home to a parent colony in a rotting tree stump nearly 100 yards from the house. Those industrious little architects had built multiple satellite colonies throughout the home’s structure.”
Step 2: Implement a Multi-Faceted Treatment Approach
Once you’ve identified where the ants are living and their travel routes, it’s time to take action with a comprehensive approach.
A. Baiting Strategy
Baiting works brilliantly because it exploits carpenter ants’ social food-sharing behavior (called trophallaxis) to deliver toxin throughout the entire colony. The key is choosing the right bait for the season—sugar-based baits work best during spring and early summer, while protein-based options become more attractive in late summer and fall.
Place your chosen bait strategically along identified ant trails and near nest entrances (but not directly on them). Position baits in areas with consistent ant activity, always keeping them safely away from curious children and pets.
Patience is crucial with baiting. Don’t panic if you initially see more ants—that’s actually a good sign they’re finding and sharing the bait! Allow 1-2 weeks for the slow-acting toxins to work through the colony hierarchy, replenishing baits as needed.
B. Direct Nest Treatment
When you can access nests directly, targeted treatments deliver fast results. For visible nests, apply insecticidal dust containing diatomaceous earth or silica gel, or use non-repellent sprays directly into the galleries. If nests are hidden in wall voids, carefully drill small ⅛-inch holes into suspected nest areas, inject insecticidal dust or foam, then seal the holes after treatment.
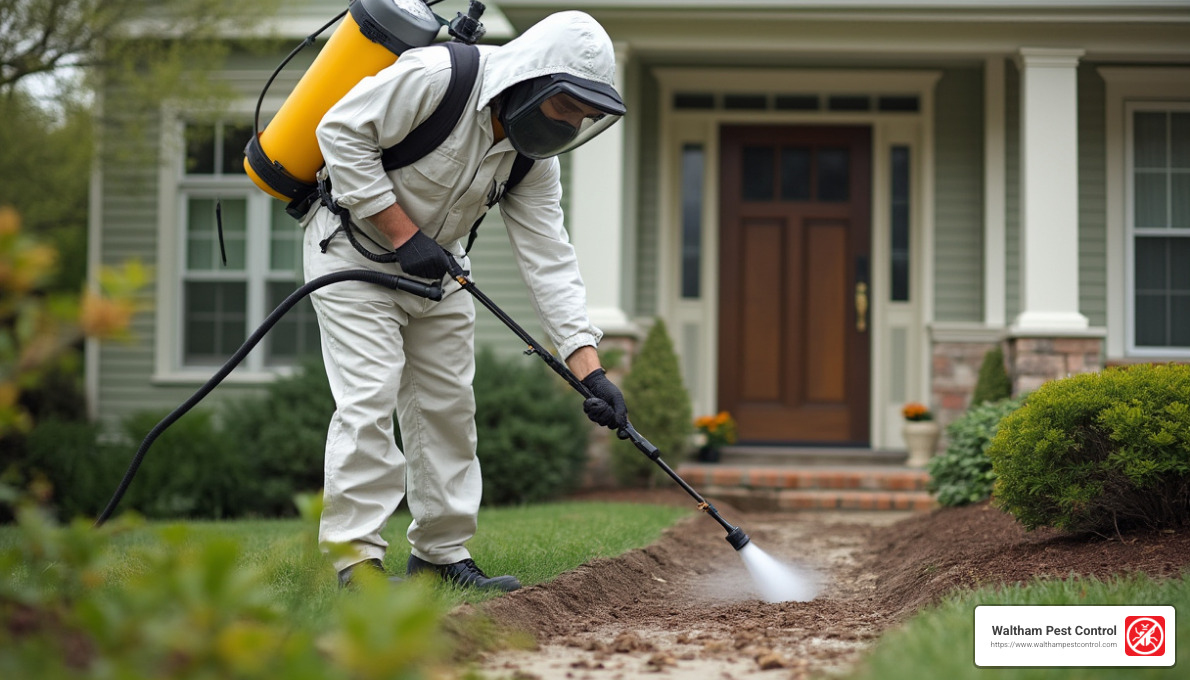
C. Perimeter Treatment
Creating a protective barrier around your home completes your defense strategy. Apply non-repellent insecticides around the foundation, treat potential entry points like windows, doors, and utility penetrations, and address any outdoor nesting sites within 100 yards of your home.
Step 3: Address Moisture Issues
Since carpenter ants are naturally drawn to damp, decaying wood, eliminating moisture problems is essential for long-term control. Fix those leaky pipes and faucets that create perfect ant habitats. Improve ventilation in perpetually damp areas like crawl spaces and basements. Repair roof leaks and damaged gutters that allow water to seep into wood structures. Consider using dehumidifiers in areas that remain stubbornly damp, and be sure to replace any water-damaged wood with dry, sound materials.
Step 4: Implement Exclusion Measures
Preventing reinfestation requires sealing potential entry points around your home. Take time to caulk cracks and crevices around windows, doors, and the foundation. Install door sweeps and weather stripping to close gaps. Seal utility penetrations where pipes and wires enter your home, and repair damaged siding, fascia boards, and trim that could provide easy access.
Step 5: Follow-Up and Monitoring
Complete elimination often requires persistence and follow-through. Conduct regular inspections for renewed activity, especially at night with your red flashlight. Maintain bait stations until you observe no activity for several weeks. Document where you’ve applied treatments and their results so you can track progress, and be prepared to repeat treatments if necessary.
For more detailed information about carpenter ant control methods, the Carpenter Ants Fact Sheet from UNH Extension offers excellent guidance. You can also learn about protecting your home from structural damage on our website.
How to Exterminate Carpenter Ants in House with Targeted Baiting
Baiting is perhaps the most effective DIY approach for how to exterminate carpenter ants in house problems. Its beauty lies in how it uses the ants’ own behavior against them—when foraging ants find your bait, they carry it back to share with the entire colony, including the queen.
Boric Acid Baits: A Proven Solution
Boric acid has been a reliable ant control agent for over a century. It works by disrupting the ants’ digestive systems while damaging their exoskeletons, ultimately causing dehydration and death.
Creating an effective boric acid bait at home is simple. For a basic sugar bait that works wonderfully in spring and early summer, mix 3 tablespoons of boric acid with ½ cup granulated sugar and 1½ cups warm water, stirring until completely dissolved. If your ants seem more interested in protein (common in late summer), try mixing 2 tablespoons boric acid with ¼ cup peanut butter or canned tuna and 2-3 tablespoons honey or maple syrup to form a paste.
“The key to successful baiting is getting the concentration just right,” our technical director often emphasizes. “Too much boric acid will kill the foraging ants before they can share it with the colony. Too little won’t be effective. We’ve found the 3:1 ratio of sugar to boric acid hits the sweet spot for most carpenter ant colonies.”
When placing your baits, look for active trails where ants consistently travel. Use small containers like bottle caps or commercial bait stations to contain liquid baits. Deploy them in multiple locations to increase the chances of findy, but always keep safety in mind by using tamper-resistant stations if you have children or pets.
Focus on indoor hotspots near moisture sources and food preparation areas. Outdoors, position baits near your foundation, under decks, along fence lines, and near trees with visible ant activity.
Be patient with your baiting strategy. Initially, you may actually see more ants as they find and recruit others to the bait—this is actually a good sign! Let them freely carry bait back to the nest and track which bait stations show the most activity. Check baits every 2-3 days and replace when depleted or dried out. If ants ignore your sugar baits, switch to protein-based alternatives. Complete colony elimination typically takes 2-4 weeks as the toxin works its way through the entire colony.
One of our Arlington customers shared: “I was skeptical about the sugar-borax solution, but after placing it along the baseboards where I’d seen ants, the activity increased dramatically for two days, then gradually diminished. After two weeks, I haven’t seen a single carpenter ant in my kitchen.”
For scientific information about the effectiveness and safety of boric acid and other treatment options, you can refer to research on pyrethrins from the National Pesticide Information Center.
How to Exterminate Carpenter Ants in House with Direct Nest Treatments
When you’ve successfully located carpenter ant nests in your home, direct treatment offers the most immediate and effective control. This approach works particularly well for satellite colonies established inside wall voids, attics, or other structural areas.
The Drill-and-Dust Method
This targeted technique delivers insecticidal dust directly into carpenter ant galleries with surgical precision. To prepare, gather your equipment: a drill with 1/8-inch bit, insecticidal dust (diatomaceous earth or commercial dust), a hand duster or bulb applicator, and safety gear (mask, goggles, gloves). Always turn off electricity if working near wiring and clear your work area.
Identify the best injection points by looking for visual evidence like frass piles or listening for rustling sounds. Mark drilling points approximately 6 inches apart along the suspected gallery system, being careful to check for electrical wires, plumbing, or other obstacles before drilling.
Drill small 1/8-inch holes into the wall void or wooden structure, then use your hand duster or bulb applicator to inject insecticidal dust into each hole. Apply enough dust to coat the gallery interior without excessive buildup, then seal holes with wood putty or caulk after application.
“The drill-and-dust method requires precision,” our lead technician often reminds homeowners. “We encountered a severe infestation in a Belmont home where the carpenter ants had established multiple satellite colonies within the wall voids of a second-floor bathroom. By drilling strategic injection points and applying diatomaceous earth, we eliminated the colonies without removing any drywall.”
Several dust options work effectively against carpenter ants. Diatomaceous Earth (DE) is a natural option made from fossilized diatoms that works by absorbing oils from the ant’s exoskeleton, causing dehydration. Food-grade DE is safer around children and pets and remains effective as long as it stays dry.
Silica Gel Dust works more quickly than DE by rapidly dehydrating insects. It provides longer residual control (up to 12 months) and remains effective even in higher humidity conditions, making it excellent for severe infestations.
Commercial Insecticidal Dusts contain active ingredients specifically formulated for carpenter ants, providing both contact killing and residual control. These ready-to-use formulations often come with specialized applicators and work best for severe or persistent infestations.
For accessible nests or wood surfaces with visible activity, non-repellent liquid applications can be highly effective. Choose products specifically labeled for carpenter ants, preferably with low-odor formulations for indoor use. These modern non-repellent formulations allow ants to travel through treated areas, unknowingly picking up the active ingredient and transferring it throughout the colony.
“Non-repellent sprays are game-changers in carpenter ant control,” our technical director explains. “Unlike older repellent insecticides that simply scattered colonies, these modern formulations allow ants to travel through treated areas, unknowingly picking up the active ingredient and transferring it throughout the colony.”
In our decades serving communities from Cambridge to Woburn, we’ve found that combining direct nest treatments with preventive measures and baiting strategies provides the most comprehensive control. For severe or persistent infestations, however, professional intervention often becomes necessary—something to consider if your DIY efforts aren’t yielding results.
DIY vs. Professional Treatment: Costs, Risks & Results
When you’re staring down a carpenter ant problem in your Lexington colonial or Cambridge triple-decker, you’ve got a choice to make: grab some sprays from the hardware store or call in the cavalry. As someone who’s helped thousands of Massachusetts homeowners through this decision, I’ve seen both approaches work—and fail—depending on the situation.
Effectiveness Comparison
Let me be straight with you: DIY treatments can work, but they come with significant limitations. They’re best suited for catching problems early when you’ve only spotted a few carpenter ants exploring your kitchen counter. Even then, success depends heavily on correctly identifying the species and choosing the right treatment approach.
“I had a customer in Arlington who spent six months chasing carpenter ants with grocery store sprays,” recalls our senior technician Mark. “By the time we arrived, what started as a minor problem had expanded into three separate satellite colonies behind her kitchen cabinets, bathroom walls, and master bedroom.”
The reality is most DIY efforts only address the visible 5% of the problem—the foraging workers you actually see—while leaving the hidden colonies intact and thriving. Professional treatments, on the other hand, target both what you can see and what you can’t.
Our trained technicians bring specialized tools and expertise to:
– Locate hidden parent and satellite colonies through thermal imaging and moisture meters
– Access commercial-grade products unavailable to homeowners
– Implement comprehensive treatment plans that address the entire infestation
– Provide warranties that protect your investment
While DIY treatments typically require multiple applications over weeks or months, professional services often resolve even significant infestations in a single visit (though severe cases may require follow-up).
Cost Considerations
Let’s talk numbers—because budget matters to everyone.
For the DIY approach, internet research shows you might spend:
– $30-$50 for basic baits and sprays
– $75-$150 for a more comprehensive DIY kit
But there are hidden costs to consider. Beyond the products themselves, you’re investing your time in research, application, monitoring, and likely repeated treatments. And if your efforts aren’t successful, you might face much larger expenses for structural repairs down the road.
For professional services, internet averages (not Waltham Pest Control pricing) typically range from:
– $250-$500 for basic treatment
– $500-$1,500 for comprehensive treatment of severe infestations
– $1,500-$3,000+ for extreme cases with significant structural involvement
While professional treatment requires a larger upfront investment, it often includes thorough inspection, targeted treatment, and follow-up visits to ensure the problem is resolved. Many companies (including ours) also offer maintenance plans to prevent future problems, potentially saving you thousands in structural repairs.
These figures represent general ranges based on internet research. For specific pricing on our services, I’d recommend contacting our office directly for a personalized quote based on your unique situation.
Risk Factors to Consider
When weighing your options, consider these potential pitfalls of the DIY approach:
Misidentification is surprisingly common. I’ve visited homes where homeowners were treating for carpenter ants when they actually had carpenter bees, or vice versa. Different pests require completely different treatment approaches.
Improper chemical application poses serious health risks to your family and pets. I’ve seen well-intentioned homeowners apply too much product in the wrong places, creating unnecessary exposure.
Perhaps most concerning is failure to find hidden nests. Carpenter ants are masters of concealment, establishing colonies inside wall voids, beneath insulation, or within structural timbers where they can remain undetected for years while causing progressive damage.
Professional pest management brings significant advantages to the table. Our licensed technicians understand carpenter ant biology and behavior intimately. We can properly identify the species, safely apply appropriate treatments, assess moisture issues that attract carpenter ants in the first place, and provide warranty protection on our work.
“One of the biggest advantages we bring is our ability to see the big picture,” explains our senior inspector. “In a recent case in Winchester, what the homeowner thought was a simple carpenter ant problem was actually a symptom of significant moisture intrusion from an improperly flashed chimney. By addressing both the ants and the underlying moisture issue, we prevented thousands in potential structural repairs.”
For those interested in our professional approach to pest management, learn more about our comprehensive pest control services.
When Home Remedies Aren’t Enough—Call the Pros
While I’ll never discourage someone from trying to solve a minor problem themselves, certain situations clearly call for professional help. It’s time to pick up the phone when:
You’ve spotted signs of significant structural damage. If you’re noticing sagging floors, buckling window frames, or hollow-sounding beams, you’re likely dealing with advanced damage that requires professional assessment.
DIY treatments have failed after multiple attempts. If you’ve diligently applied baits and sprays but still see ants marching across your countertop, something isn’t working—perhaps there’s a parent colony outside that keeps replenishing your indoor population.
You’ve finded multiple satellite colonies throughout your home. Different sized ants appearing in various locations often indicates a mature, well-established infestation with multiple colony sites.
Your home has complex construction features that make DIY treatment challenging. Historic homes with post-and-beam construction or houses with extensive crawl spaces can harbor colonies in difficult-to-access areas.
You value peace of mind and quick resolution. Sometimes, the greatest benefit of professional service is simply knowing the problem is being handled correctly, with warranty protection to back it up.
One Waltham customer from Lexington shared: “After trying store-bought sprays and baits for three months with little success, I finally called Waltham Pest Control. Their technician found the main colony in my attic within minutes—somewhere I hadn’t even thought to check. The problem was resolved with one treatment, and I only wish I’d called them sooner.”
With over 40 years of experience serving Eastern Massachusetts communities from Acton to Woburn, our team brings specialized knowledge, professional-grade products, and a systematic approach that addresses both the immediate infestation and long-term prevention of how to exterminate carpenter ants in house situations.
Preventing Future Infestations: Long-Term Carpenter Ant Defense
Once you’ve successfully tackled a carpenter ant problem, the last thing you want is to face another invasion down the road. After helping thousands of homeowners throughout Eastern Massachusetts over four decades, I’ve seen that prevention truly is the most cost-effective strategy when it comes to how to exterminate carpenter ants in house situations.
Moisture Control: The First Line of Defense
If there’s one thing carpenter ants love more than anything, it’s moisture-damaged wood. Think of water as a welcome mat for these destructive pests. That leaky bathroom pipe? It’s basically sending out invitations to your neighborhood ant colony.
“I remember visiting a beautiful Colonial in Winchester where the homeowner couldn’t figure out why carpenter ants kept returning,” shares our senior technician. “We finded an undetected slow leak behind their dishwasher creating the perfect environment for nesting. Once we addressed that moisture source, the recurring ant problem disappeared completely.”
Your moisture management strategy should focus on prompt repairs of any water issues. Those dripping faucets, subtle roof leaks, and damaged window seals aren’t just wasting water—they’re creating prime carpenter ant real estate. Beyond fixing leaks, proper drainage around your foundation is crucial. Make sure your yard slopes away from your home, your gutters and downspouts are clean and functional, and consider French drains if you have persistent wet areas.
Don’t overlook ventilation either. A steamy bathroom without a working exhaust fan or a damp basement without dehumidification creates ideal conditions for wood decay and subsequent ant invasion. In many homes across Middlesex County, we’ve found that simply improving airflow dramatically reduces pest pressure.
Landscape Management for Ant Prevention
Your yard serves as either a barrier or a bridge for carpenter ants seeking to enter your home. Creating a thoughtful landscape defense starts with maintaining a protective zone around your property.
That firewood stacked against your house? It’s essentially an ant highway directly into your home. Keep firewood, lumber, and other wood products at least 20 feet from your foundation and lifted off the ground. While you’re at it, remove those old tree stumps, fallen logs, and dead trees from your property—they’re essentially carpenter ant condominiums.
“The most common mistake I see homeowners make is letting vegetation touch their home,” notes our landscape specialist. “Those shrubs brushing against your siding and tree branches touching your roof are like bridges inviting ants inside.”
Trim branches so they don’t touch or overhang your roof, maintain at least three feet of clearance between shrubs and your foundation, and promptly remove dead limbs that could serve as nesting sites. Your mulch practices matter too—keep mulch at least six inches from your foundation and no deeper than 2-3 inches. Many of our Burlington and Bedford customers have found success with cedar mulch, which has natural repellent properties.
Don’t forget about regular inspection of wooden structures around your property. Those decks, porches, and fences need annual checks for early signs of decay. Catching and replacing rotting wood promptly removes potential nesting sites before carpenter ants can establish colonies.
Structural Exclusion Techniques
Even the most diligent moisture control and landscape management won’t help if ants have easy access points into your home. Creating physical barriers is essential for keeping carpenter ants out.
Start by sealing entry points around your home. Those tiny cracks around windows, gaps around doors, and openings where utilities enter your home are all potential highways for invading ants. Quality caulk, door sweeps, weather stripping, and mesh screens over vents can make a world of difference.
Wood-to-soil contact creates particularly vulnerable areas. “One simple change that dramatically reduces carpenter ant problems is installing concrete footers under wooden steps or deck supports,” explains our construction specialist. “That direct wood-to-soil contact is practically an invitation for carpenter ants.” Metal flashing between your foundation and wooden elements creates another effective barrier, and maintaining the recommended six-inch clearance between wood siding and soil creates a visible inspection zone.
For new construction or repairs, consider borate-treated lumber, which has built-in resistance to carpenter ants and other wood-destroying insects. Many of our Lexington customers have found success with professional perimeter treatments as part of their seasonal maintenance routine.
Regular Inspection and Monitoring
Even with the best prevention measures in place, regular inspection remains your strongest ally in the fight against carpenter ants. Think of it as checking your home’s vital signs—catching problems early means simpler, less expensive solutions.
Spring inspections are perfect for checking winter damage and catching early ant activity when colonies are just becoming active. Summer monitoring should focus on high-risk areas during peak ant season, while fall is ideal for sealing entry points before pests seek winter shelter. Don’t overlook winter inspections of interior spaces, especially near heat sources where ants might remain active.
Focus your attention on high-risk areas: bathrooms, kitchens, and laundry rooms with their moisture sources; areas with previous infestations; often-overlooked spaces like attics, crawl spaces, and basements; perimeters around windows and doors; and anywhere wood meets concrete or stone.
“The most successful homeowners I work with keep a simple pest journal,” shares our customer support manager. “Nothing fancy—just notes about when and where they spot pests, what maintenance they’ve done, and any changes to their home. These records are invaluable when developing long-term prevention strategies.”
By implementing these preventive measures consistently, you’ll create an environment that’s far less hospitable to carpenter ants. For more detailed information about preventing carpenter ants around your property, visit our guide on carpenter ants outside house.
Prevention truly is the best form of pest control. It’s always less costly, less stressful, and less disruptive than dealing with an established infestation. And remember—our team at Waltham Pest Control is always here to help with preventive treatments, inspections, or advice custom to your specific Eastern Massachusetts home.
Monitoring & Maintenance: Confirming the Colony Is Gone
After you’ve tackled your carpenter ant problem, the battle isn’t quite over. Think of this monitoring phase as your victory lap—but one where you need to stay vigilant. Having helped thousands of homeowners throughout Eastern Massachusetts bid farewell to these wood-destroying pests, I’ve seen how proper follow-up makes all the difference between a temporary fix and a permanent solution.
Immediate Post-Treatment Monitoring
Those first few weeks after treatment are absolutely critical. I remember visiting a home in Lexington where the homeowner was convinced the problem was solved after just two days of not seeing ants. When we checked more carefully, we found a satellite colony still active in the bathroom wall.
During this initial period, you’ll want to be especially observant. Take a few minutes each evening (when carpenter ants are most active) to check previously infested areas with a flashlight. Look specifically for fresh frass—those telltale sawdust-like wood shavings that indicate continued excavation. If you’ve cleaned up all the previous frass and new piles appear, that’s a red flag that some ants survived the treatment.
Sticky traps can be your best friends during this phase. Place them along baseboards, near windows, and other areas where you previously spotted ant activity. These silent sentinels work 24/7, capturing any stragglers and giving you concrete evidence about whether your treatment worked.
For the truly thorough, try the listening test. Place your ear against suspicious walls at night, or use a stethoscope (or even the handle of a screwdriver pressed against the wall and your ear) to amplify the faint rustling sounds of ants at work. It might feel silly, but this method has helped many of our customers detect persistent activity that would have otherwise gone unnoticed.
“The first two weeks after treatment are critical,” explains our quality assurance supervisor. “We typically see a dramatic reduction in activity within 48 hours, but complete elimination can take up to two weeks as the treatment works through the colony.”
Long-Term Monitoring Strategies
Once the immediate threat seems contained, it’s time to shift to maintenance mode. Think of it as similar to dental check-ups—regular monitoring prevents small problems from becoming big ones.
Set a calendar reminder for monthly checks during the first quarter after treatment. Then, if all remains quiet, you can scale back to quarterly inspections. Many of our most diligent customers in communities from Cambridge to Woburn maintain a simple inspection log, noting the date and any observations.
Technology can be a helpful ally in your monitoring efforts. Some of our tech-savvy customers use smart pest monitors that can alert them to activity, while others simply take dated photos of previously infested areas to track any changes over time. A customer in Arlington created a simple spreadsheet with inspection dates and notes that helped him identify a seasonal pattern in minor ant activity around his deck.
Perhaps most importantly, stay vigilant about moisture issues—they’re practically an engraved invitation for carpenter ants. After heavy rains, check those areas that previously had problems. Invest in a simple moisture meter (available at most hardware stores) to monitor humidity levels in basements, crawl spaces, and attics.
Signs of Successful Elimination
How can you be confident that your how to exterminate carpenter ants in house efforts have truly succeeded? The most obvious sign is the complete absence of ant activity for at least a month. No live ants, no fresh frass, no sounds within walls, and clean monitoring traps all suggest your treatment was effective.
Look also at the structural elements that were previously damaged. Successfully repaired wood should remain intact, with no new excavation visible. Previously damp areas should now be dry and stay that way. The true test often comes during spring, when carpenter ant colonies become most active and swarmers (winged reproductive ants) emerge. If you make it through spring without seeing these winged invaders inside your home, you can be increasingly confident in your success.
One of our customers in Arlington shared: “After Waltham treated our carpenter ant problem, they showed us how to monitor the affected areas. We set up a quarterly inspection routine, checking the previously infested areas with a flashlight and looking for any signs of fresh sawdust. It’s been two years now without any signs of the ants returning.”
When to Seek Re-Treatment
Despite your best efforts and thorough treatment, sometimes carpenter ants prove stubborn. If you continue seeing ants after the expected elimination period (typically two weeks), or if fresh frass appears in previously treated areas, it may be time to consider additional treatment.
Sometimes, what appears to be a treatment failure is actually a new infestation from a different colony. Pay attention to where you’re seeing activity—if it’s in a completely different area of your home, you might be dealing with a new invasion rather than a persistent old one.
Environmental changes can also trigger new infestations. After significant storms, plumbing leaks, or major home renovations, it’s worth conducting a thorough inspection. New moisture sources can attract carpenter ants from nearby outdoor nests, even if your previous treatment was successful.
At Waltham Pest Control, we understand that complete elimination sometimes requires persistence. That’s why we stand behind our treatments with follow-up inspections and re-treatments when necessary. Our goal isn’t just to temporarily chase away these destructive pests but to provide lasting protection for your Eastern Massachusetts home.
Maintaining a carpenter ant-free home is an ongoing partnership between you and your pest professional. Your vigilance combined with our expertise creates the most effective long-term defense against these destructive pests.
Frequently Asked Questions about Carpenter Ant Control
After four decades of helping homeowners throughout Eastern Massachusetts tackle carpenter ant problems, our team at Waltham Pest Control has heard just about every question imaginable. Here are the most common questions we receive about how to exterminate carpenter ants in house situations—along with our expert answers.
How to exterminate carpenter ants in house quickly without harmful fumes?
Many of our customers, especially those with young children, pets, or chemical sensitivities, worry about strong odors and harmful fumes during carpenter ant treatment. The good news is that effective, low-odor options do exist.
Non-repellent, low-odor liquid insecticides have revolutionized indoor ant control. These modern formulations work effectively when applied to nests or trails without filling your home with unpleasant smells. Just be sure to choose products specifically labeled for indoor use.
Diatomaceous earth and silica gel dusts are excellent alternatives that work mechanically rather than chemically. “These products are practically odorless,” explains our senior technician Mark. “They work by damaging the ant’s exoskeleton, causing them to dehydrate and die. When we inject these into wall voids where nests are hiding, customers don’t have to worry about chemical smells lingering in their living spaces.”
Bait stations offer another fume-free approach. Rather than spraying products into the air, enclosed bait stations contain the active ingredients while still allowing ants to access the treatment and carry it back to their colony. We’ve seen excellent results placing these along established ant trails, especially in kitchens and bathrooms.
For those committed to botanical solutions, plant-based insecticides containing pyrethrin can provide faster knockdown with less residual odor than traditional chemicals. Though, that you may need to apply these more frequently.
“My favorite approach for sensitive households,” shares our technician Sarah, “is combining targeted dust injection into known nest areas with strategically placed bait stations along travel routes. Last month, we helped a family in Lexington with a newborn baby eliminate a significant carpenter ant problem without a single complaint about odors or fumes.”
How long does it take to exterminate carpenter ants in house completely?
When carpenter ants have made themselves at home in your walls, patience becomes an important part of the elimination process. The timeline for complete carpenter ant control varies significantly based on several key factors.
Infestation severity plays a major role in treatment timelines. For minor, localized problems where you’ve caught the problem early, you might see complete elimination in just 1-2 weeks. Moderate infestations with satellite colonies typically take 2-4 weeks to fully resolve. Severe cases with multiple established colonies throughout your home can require 4-8 weeks or sometimes longer to completely eliminate.
Your chosen treatment method also impacts timing. Direct nest treatments deliver the fastest results—often showing significant improvement within 1-7 days. Baiting approaches work more slowly but often more thoroughly, typically requiring 2-4 weeks as the toxin works its way through the entire colony hierarchy. Most professional treatments combine multiple approaches for a 1-3 week resolution timeline.
“The most common question I hear on service calls is ‘how quickly will they be gone?'” says our operations manager Tom. “I always explain that while you’ll typically see a dramatic reduction in visible ants within days, complete elimination takes longer because we need to reach the hidden queen and developing brood.”
Nest accessibility creates another variable. Visible, accessible nests can be treated directly for quicker elimination. Hidden nests tucked away in wall voids require the ants to encounter and transport treatment back to the colony, extending the timeline. Homes with multiple nests throughout the structure naturally take longer to treat completely.
Environmental factors matter too. Ongoing moisture issues can delay complete elimination by continuing to create favorable conditions for the ants. Seasonal timing affects treatment efficacy—spring and summer treatments often work faster due to increased ant activity. Even your home’s construction type influences treatment time, with complex structures requiring more thorough and time-consuming approaches.
Most professionally treated infestations in the homes we service from Boston to Lexington are resolved within 2-3 weeks, with follow-up treatments occasionally necessary for severe cases.
Are natural methods enough to exterminate carpenter ants in house permanently?
As interest in eco-friendly pest control continues to grow, we’re frequently asked whether natural methods can effectively eliminate carpenter ant infestations. The answer isn’t a simple yes or no—it depends on several important factors.
Natural methods tend to work best on small, localized infestations caught early. When carpenter ants have only recently begun establishing themselves in your home, natural approaches have a much higher success rate. For larger or well-established colonies, natural methods may struggle to reach all members of the colony, particularly the all-important queen.
The accessibility of the nest dramatically impacts natural treatment success. When you can directly treat a visible nest with substances like diatomaceous earth, results can be excellent. For nests hidden deep within walls or structural timbers, natural products may not adequately penetrate to reach all ants.
Among natural options, diatomaceous earth ranks among the most effective choices. This natural substance works mechanically, scratching the ants’ exoskeletons and causing them to dehydrate. When applied directly to nests or travel paths, it can be highly effective without introducing synthetic chemicals into your home.
Boric acid baits also show good results when properly formulated. “The key is getting the concentration right and making the bait attractive enough that ants prefer it over other food sources,” explains our IPM specialist Jennifer. “I recommend mixing boric acid with sweet foods like honey or maple syrup in spring and early summer, then switching to protein baits like peanut butter in late summer and fall when the ants’ dietary preferences shift.”
Essential oils—particularly tea tree, clove, and citrus oils—can provide repellency and contact killing power. Vinegar solutions effectively disrupt pheromone trails but offer limited killing power on their own. Both work best as part of a comprehensive natural approach rather than standalone solutions.
One Cambridge customer shared her success story: “I was determined to solve my carpenter ant problem without synthetic pesticides because of my young children. I used a combination of diatomaceous earth along baseboards and boric acid mixed with honey on bottle caps. It took about three weeks of consistent application, but the ants eventually disappeared completely. The key was also fixing the leaky bathroom pipe that had attracted them in the first place.”
This customer’s experience highlights the most important aspect of natural carpenter ant control—addressing the underlying moisture issues that attracted the ants in the first place. Without fixing leaks, improving ventilation, and eliminating damp conditions, even the most thorough natural treatment will likely be temporary.
For those committed to natural approaches, we recommend combining multiple methods, implementing thorough exclusion measures, and being prepared for a potentially longer treatment timeline. And remember—sometimes the most environmentally friendly approach is getting the problem resolved quickly and completely, even if that means using targeted conventional treatments to prevent extensive structural damage to your home.
Conclusion
Dealing with carpenter ants requires a comprehensive approach that addresses both the immediate infestation and the conditions that attracted them in the first place. Throughout Eastern Massachusetts, from Boston’s historic homes to newer constructions in communities like Burlington and Lexington, carpenter ants remain one of the most persistent and potentially destructive pests we encounter.
The key to successful carpenter ant management lies in this three-part strategy:
First, you need accurate identification and thorough inspection to locate all colonies. What you see on the surface is just the tip of the iceberg. Second, implement targeted treatment using the appropriate methods for your specific situation, whether that’s baiting, dusting, or a combination approach. Finally, commit to long-term prevention through moisture control, exclusion, and regular monitoring.
Whether you choose to tackle the problem yourself or enlist professional help, understanding the biology and behavior of carpenter ants significantly improves your chances of success. Those visible ants marching across your kitchen counter represent only a small fraction of the colony—effective treatment must reach the hidden nests and the reproductive members, particularly the queen.
For minor infestations, DIY approaches using baits, dusts, or targeted sprays can be effective when properly applied. However, for extensive infestations, those involving structural elements, or situations where DIY methods have failed, professional intervention often provides the most efficient and lasting solution.

At Waltham Pest Control, we’ve spent over 40 years helping homeowners throughout Eastern Massachusetts resolve carpenter ant problems using integrated pest management techniques that minimize chemical use while maximizing effectiveness. Our approach isn’t one-size-fits-all—we combine detailed inspection, targeted treatments, and practical prevention recommendations custom to each home’s unique characteristics.
Ongoing vigilance is essential even after successful treatment. By implementing the prevention strategies outlined in this guide and conducting regular inspections, you can protect your investment and avoid future infestations. Your home is likely your biggest investment—protecting it from these silent destroyers is worth the effort. For more information about ant prevention in general, visit our guide on house ants prevention and treatment.
When it comes to how to exterminate carpenter ants in house situations, early intervention prevents costly damage. If you’re noticing sawdust-like frass, hearing rustling in your walls, or spotting large black ants in your Eastern Massachusetts home, don’t wait until they’ve established multiple colonies. Waltham Pest Control is ready to help with expert inspection, effective treatment, and practical prevention advice custom to your specific needs. With the right approach, you can reclaim your home from these wood-destroying pests and keep them from returning.
